from June 1, 2011
Hello loyal follower(s)
Mr Nut seems to learn something new, or an improved method of doing something every time he does something related to cooking. Of course when you start from almost zero it should be easier to learn new things.
Baking Parchment Paper and how to use it when baking bread was the new discovery this time. Used in the book Kneadlessly Simple by Nancy Baggett © 2009 and also found in a 2006 Cook’s Illustrated magazine, its use seemed to be an improvement from Jim Lahey’s approach to making bread.
When Mr Nut finally gets his internet connection restored he is planning to go back and revise many of the bread recipes to reflect the use of Baking Parchment Paper.
Still searching for a rye bread that he likes, Mr Nut today used a modified recipe from Kneadlessly Simple by Nancy Baggett © 2009.

First of all, the loaf was smaller based on only four cups of flour instead of six that are needed for his large diameter base Dutch oven.
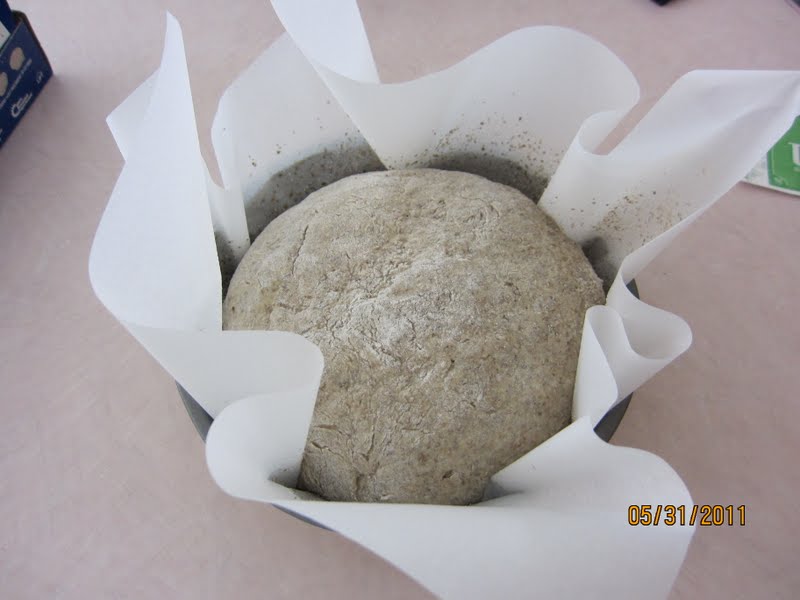
Now for the improved method of handling the dough. Instead of wrapping it in a dish towel and then having to dump it into the Dutch oven, the second fermentation was done in Baking Parchment Paper which was then used as a sling to gently place the dough into the Dutch oven

This was the loaf after it had baked in the Dutch oven for 45 minutes and and was lifted out of the Dutch oven and placed on a piece of aluminum foil ( helps keep the bottom of the loaf from burning) to finish baking.

The finished product----- good color

As you can see the bottom of the loaf was not burned.

The crumb was very good
Mr Nut found a website while on the internet at Mc Donald’s that had smaller Dutch ovens at a reasonable prices. He will probably order one but maybe not until August because he will be traveling for the next three and one half months. Ideally a Dutch oven with an interior base diameter of 7 to 8 inches.
Recipe follows:
À bientôt
Mr Nut
Rustic Rye
From kneadlessly simple by Nancy Baggett ©2009
Modified for cuisinart 7 qt stand mixer with
Speeds 1 - 12
Yield one 9 inch round
Made without molasses, brown sugar, or any of the other ingredients used to deepen rye bread color as in the Swedish Limpa from the grandmother of Cyndy’s recipe from circa 1910. This bread is lighter than many of the other rye breads. The flavor of the grain takes center is apparent, and, since the dough is not sweet, the pleasing slight bitterness of the rye comes through.
Long first fermentation was used in this recipe. The fermentation process is aided by the addition of dough enhancer (see blog of April 5, 2011). A combination of caraway, fennel, and dill seeds lends the best flavor to the bread.
Ingredients:
2 cups (10 ounces: 280g) rye flour
2 cups (10 ounces: 280 g) unbleached white bread flour.
1/4 cup ( 1.25 ounces: 35g)dough enhancer.
1/4 cup ( 1.25 ounces: 35g) Vital wheat gluten
1 1/2 tablespoons granulated sugar.
2 teaspoons Sea salt
1 tablespoon assorted seeds, preferably 1 teaspoon each caraway, fennel, and dill seeds mixed
together (or substitute 1 tablespoon caraway seeds). (save 1 teaspoon of seed mixture for pressing into top of dough just before baking)
together (or substitute 1 tablespoon caraway seeds). (save 1 teaspoon of seed mixture for pressing into top of dough just before baking)
3/4 teaspoon instant yeast.
About 2 1/4 cups water.
2 tablespoons apple cider vinegar.
Canola oil or oil spray for coating dough
Directions:
- Dry mix: In the mixer bowl using the Chef’s Whisk at speed one, mix together the blue ingredients.
- Wet Mix: In a separate bowl mix by hand the red ingredients.
- Combine by adding the wet mix to the dry mix. Keep mixing to a minimun, and aim for a stiff dough. Move the dough from the mixer bowl to another bowl (oiled ) so you can clean the mixer bowl.
- First Fermentation: brush or spray the top of the dough with oil. Cover the bowl with plastic wrap. Then let rise at room temperature for 12 to 18 hours. (around 75℉)
- Deflate dough: Gently press down on center of dough to deflate. Holding edge of dough with fingertips, fold dough over itself by gently lifting and folding edge of dough toward middle. Add more rye flour if the dough is sticky, aim for a stiff dough. Turn bowl quarter turn; fold again. Turn bowl and fold dough 6 more times (maximum of 8 folds).
- Second Fermentation: Set out a 15-inch square of baking parchment paper. Spray it with nonstick spray, then generously dust it with rye flour. Invert the dough into the center of the parchment. Generously dust the dough with more rye flour. Smooth out and round the surface to form a round shaped, domed loaf; it may be sticky, so flour your hands, and sprinkle more flour over the top as needed. Using the parchment paper as a sling, transfer the loaf to a skillet or bowl just slightly smaller in diameter than the dutch oven to be used. Tent the bowl with nonstick spray-coated foil. Let it ferment for 1 1/2 to 2 hours until the dough doubles from the deflated size.
- Prepare Oven: 20 minutes before baking time, put a rack in the middle of the oven with the Dutch oven; preheat to 450°F. If you have a pizza stone place it near the bottom of the oven it will act as a heat sink.
- Final Dough preparation: Sprinkle or spray the dough top generously with water. Sprinkle on the remaining seeds, patting down to embed slightly. Using well-oiled serrated knife or razor, cut a 1/2-inch-deep, 3-inch diameter circular slash in the dough center. Using the parchment paper as a sling, carefully lift the dough into the pot; take care not to touch the hot pot. Immediately top the pot with its lid.
- Baking: Reduce the heat to 425°F. Bake on the lower rack for 45 minutes. Remove the lid. Using the parchment paper, lift the loaf from the pot and place on a piece of aluminum foil. Pull the parchment away from the loaf sides so they are exposed. (If the top is well browned, cover it with foil.) Bake for 25 to 35 minutes longer, until a skewer inserted in the thickest part comes out with just a few crumbs on the tip (or until the center registers 210° to 212°F on an instant-read thermometer). Then bake for 5 minutes longer to ensure the center is baked through. Note: the appearance of the loaf is more important in determining the doneness of the loaf than the internal temperature (from Cook's illustrated magazine, May-June 2011 page 31). Cool thoroughly on a wire rack.
SERVING AND STORING: Cool before slicing and storing. The flavor improves after several hours of storage. To maintain the crisp crust, store in a large bowl draped with a clean tea towel or in a heavy paper bag. Or store airtight in a plastic bag or foil: The crust will soften, but can be crisped by heating the loaf, uncovered, in a 400°F oven for a few minutes. The bread will keep at room temperature for 3 days, and may be frozen, airtight, for up to 2 months.
No comments:
Post a Comment