Saturday, April 30, 2011

Glazed all-beef Meatloaf

Hello loyal follower(s)
        Today was the beginning of Cyndy going out in our front yard each morning to pick fresh strawberries for her breakfast cereal.

She picks just enough for the days breakfast.  They are much better  than the large tasteless strawberries in the store.


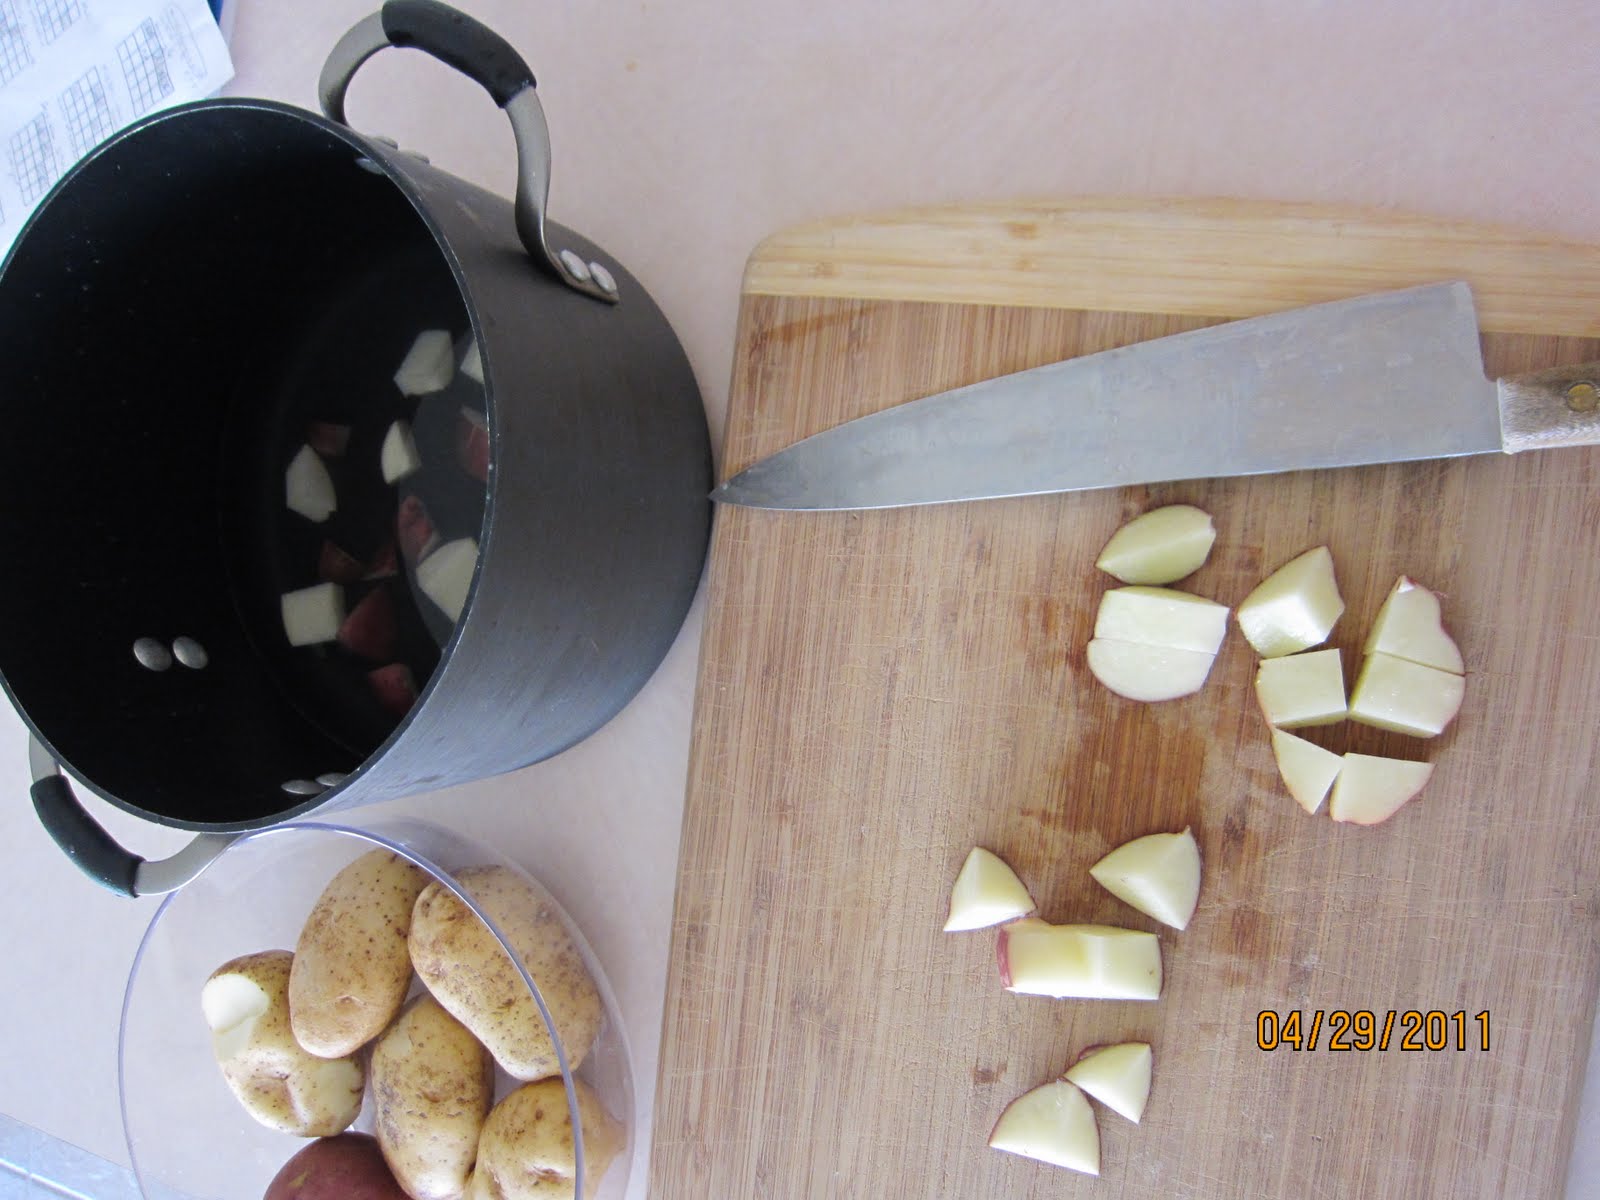
     Today Mr Nut made the Glazed all-beef Meatloaf that he made April 24, 2011 that was the basis for the blog of that day.   This time the starting point was the pieces of round steak shown below.

    Mr Nut thought it would be a good idea to make a very coarse grind of hamburger.  Bad choice, the meat loaf did not hang together very well.


The rough ground hamburger.  Along with some  of the ingredients that need to be cooked and set aside until the loaf was to be formed.


This was one of the neat things about this recipe.
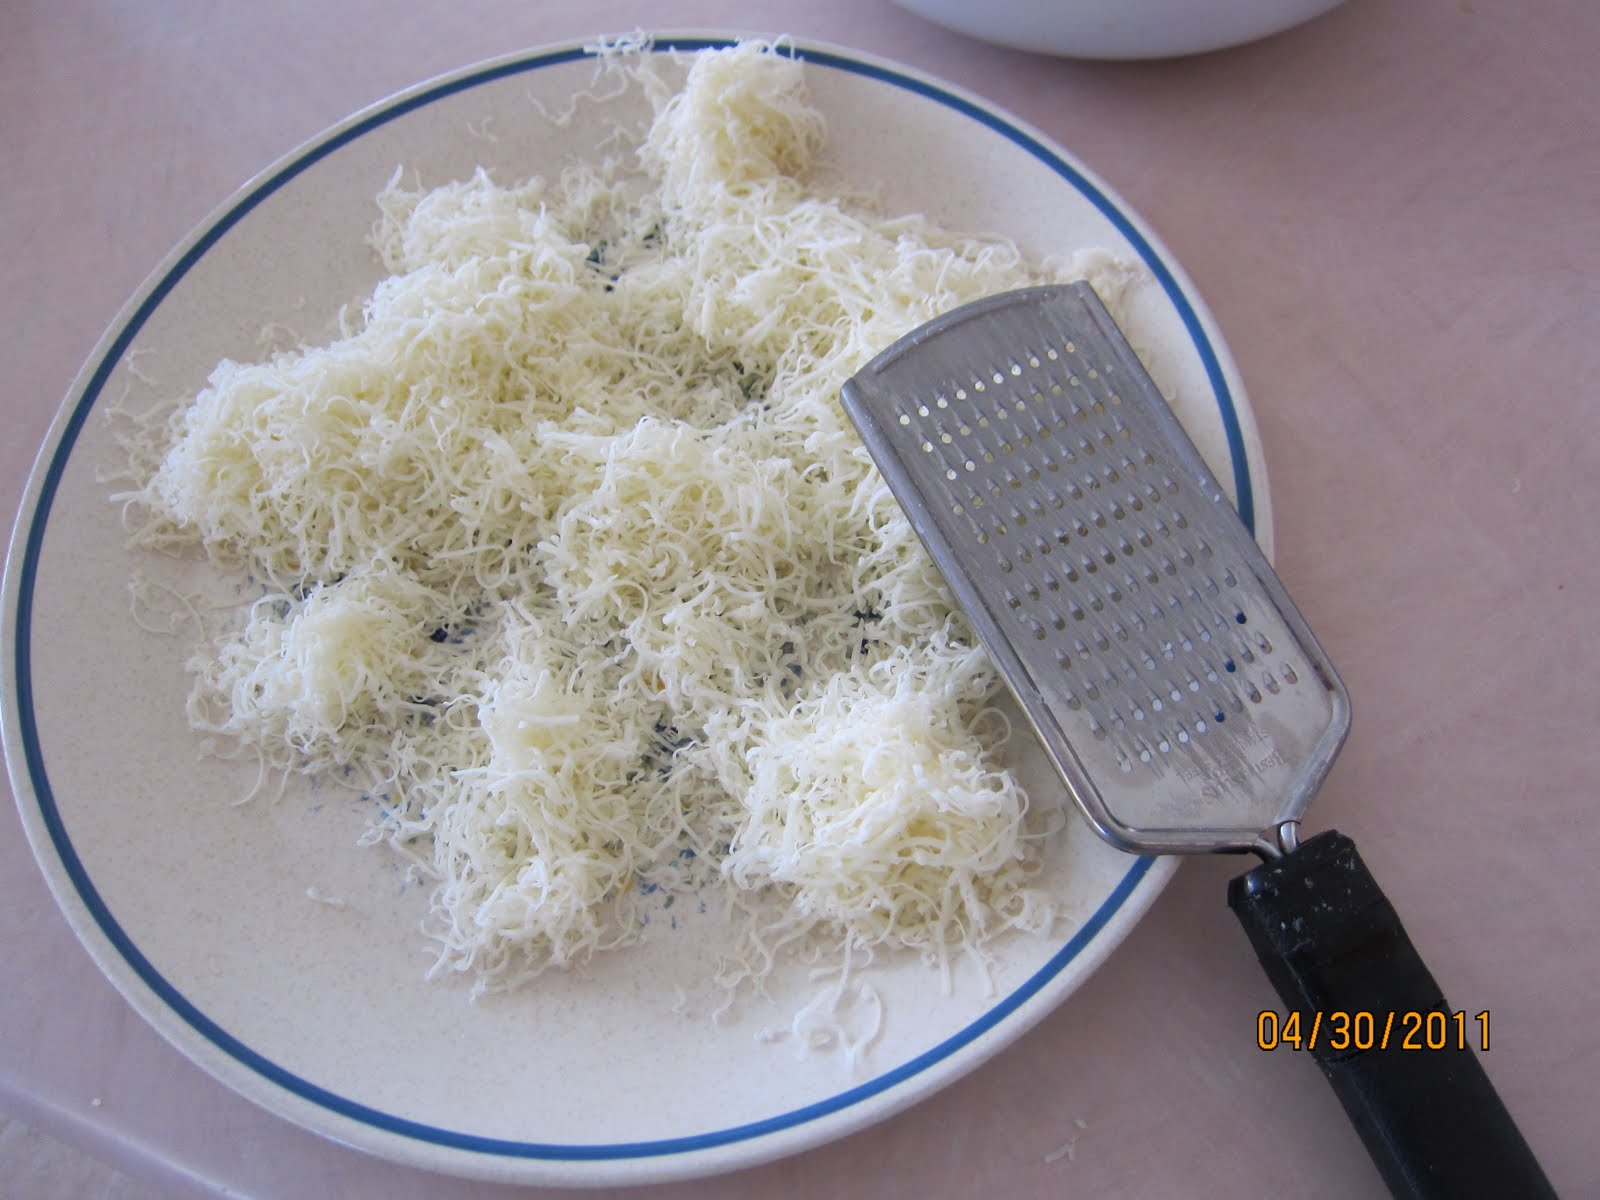
The Monterey Jack cheese was finely grated and then frozen, to be crumbled later and integrated into the loaf.


This was also a neat trick.  Aluminum foil full of holes and set on a cooling rack to allow the grease to drain away from the loaf.  Also, foil lined rimmed cookie sheet to catch the mess and avoid the clean up.


The loaf was ready for the heat (375℉).


All done time to cool and then dinner was served.

Recipe follows:

À bientôt,
Mr Nut


GLAZED ALL-BEEF MEATLOAF

Blog of April 30, 2011 revised Oct 31. 2011
From Cooks Illustrated Magazine
 Published January 1, 2006.  
Serves 6 to 8.
  
    85 percent lean ground beef worked.  Handle the meat gently; it should be thoroughly combined with other ingredients but not paste like.  Glaze the loaf using the broiler.   There are two applications of the glaze; increase cooking time for each by 2 to 3 minutes. 
For meatloaf:  43.7 carbohydrates; 3,055.5 calories.

INGREDIENTS--Meatloaf
3 ounces (about 1 cup) grated Monterey Jack cheese.  Carbs  0 g;   Calories  330


1 tablespoon unsalted butter.                                             Carbs  0 g:    Calories 100

1 medium onion, chopped fine (about 1 cup).                  Carbs  14 g:  Calories  64

1 medium rib celery , chopped fine (about 1/2 cup, 120 g)).  Carbs  2g:  Calories 9

1/2 tsp minced garlic (2.5 g).                                                    Carbs  0 g:    Calories 7

2  teaspoons minced fresh thyme leaves or 1 teaspoon dry thyme.
.
1 teaspoon paprika.                                                                  Carbs 1.2 g ; Calories 6

1/4 cup tomato juice.                                                           Carbs 2.5 g:  Calories 12.5

1/2 cup low-sodium chicken broth.                                          Carbs 1 g; Calories  15

2 large eggs.                                                                 Carbs 1 g; Calories 144

1/2  teaspoon unflavored gelatin (powdered).

1  tablespoon soy sauce.                                                         Carbs 2 g ;    Calories 0

1  teaspoon Dijon mustard.                                                     Carbs 0 g;      Calories 5

2/3  cup crushed saltine crackers.                                        Carbs 22 g; Calories 120
        
2  tablespoons minced fresh parsley leaves or 2 teaspoons dry parsley flakes.

3/4  teaspoon Sea salt.

1/2  teaspoon ground black pepper.

2  pounds ground 85% or leaner ground beef.                Carbs 0 g; Calories 2244

INGREDIENTS-Glaze or just use a standard Barbecue sauce.

1/2  cup (4 ounces; 115 g ) KETCHUP.                           Carbs 35 g;  Calories  140

1 teaspoon hot pepper sauce (TABASCO)
.  
1/2  teaspoon ground coriander.
.
1/4  cup cider vinegar.

3 tablespoons (36 g; 1 1/4 ounce) packed light brown sugar. Carbs 36 g; Calories 135
                                                                                  

INSTRUCTIONS
 ABOUT One and a quarter hours BEFORE SERVING, adjust oven rack to


 middle  position; heat oven to 375 degrees. 
  1. Spread the finely grated cheese on plate and place in freezer until ready to use.
  2.   Prepare baking sheet:   Allowing meat loaf to stew in its own juices makes for a greasy mess. Try this: Fold heavy-duty aluminum foil to form a rectangle a little larger than your metal cooling rack. Center the foil on rack and place the rack in  a rimmed baking sheet lined with aluminum foil (easy cleanup). Poke holes in the foil with a skewer (about half an inch apart). Spray the foil with nonstick cooking spray.
  3. Prepare the Blue ingredients; Onion and celery.
  4. Heat 1 tablespoon of butter in 10-inch skillet over medium-high heat until foaming; add blue ingredients and cook, stirring occasionally, until beginning to brown, 6 to 8 minutes. 
  5. Add the green ingredients and cook, stirring, until fragrant, about 1 minute. 
  6. Reduce heat to low and add 1/4 cup tomato juice. Cook, stirring to scrape up browned bits from pan, until thickened, about 1 minute. Transfer mixture to small bowl and set aside to cool.
  7. Whisk 1/2 cup chicken broth  and the two eggs in large bowl until combined. Sprinkle 1/2 tsp gelatin over liquid and let stand 5 minutes. 
  8. Stir in 1 tbs soy sauce, 1 tsp mustard, 2/3 cup saltines, 2 Tbs fresh parsley leaves (or 2 tsp parsley flakes), 3/4 tsp Sea salt, 2 tsp pepper, and onion/celery  mixture. 
  9. Crumble frozen cheese into coarse powder and sprinkle over mixture. Add ground beef; mix gently with hands until thoroughly combined.
  10. Transfer meat to the perforated foil rectangle on the cooling rack and shape into 10 by 6-inch oval about 2 inches high. Smooth top and edges of meatloaf with moistened spatula. 
  11. Bake until an instant-read thermometer inserted into center of loaf reads 135 to 140 degrees, 55 to 65 minutes. Remove meatloaf from oven and turn on broiler.  
  12. While meatloaf cooks, combine Red ingredients for glaze in small saucepan; bring to simmer over medium heat and cook, stirring, until thick and syrupy, about 5 minutes, or use commercial barbecue sauce. Spread half of glaze evenly over cooked meatloaf with rubber spatula; place under broiler and cook until glaze bubbles and begins to brown at edges, about 5 minutes. Remove meatloaf from oven and spread evenly with remaining glaze; place back under broiler and cook until glaze is again bubbling and beginning to brown, about 5 minutes more. Let meatloaf cool about 10 minutes before slicing.

    Friday, April 29, 2011

    London Broil for a gas grill

    Ok gang for the last of the three activities: London Broil.
    Again based on Cook's Illustrated website from May 1, 2006,  Mr Nut learned a lot about grilling this kind of meat (cheap cut of meat).  The meat was marinated in white vinegar and red wine.  First many penetrations of the meat were made using a fork before the meat was sealed in a zip lock paper sack along with the marinade. Then the bag was turned and turned every time Mr Nut passed it.

    Check it out:


    This was the meat at the start of the grilling.  The recipe called for skewers to be placed about one inch apart through the meat.  Be creative, five inch screws (non-galvanized) worked just as well.


    The meat was grilled over high heat and flipped every 4 minutes until the internal temperature reached 120℉.  It took 15 minutes.


    The "Skewer"


    Mr Nut alias Sous Chef with the potato Salad and the medium rare London Broil.   Also we had steamed fresh beet greens from Mr Nut's garden.


    Recipe follows:

    À bientôt,
    Mr Nut


    LONDON BROIL FOR A GAS GRILL
       Based on Cook’s Illustrated website recipe Published May 1, 2006. 
    Serves 3-4. 
     We do not recommend cooking London broil beyond medium-rare. For the best texture, use a carving or slicing knife and cut the steak into very thin slices. 
    INGREDIENTS
    1/8 cup olive oil
    1/8 cup red wine
    1  bottom round steak , about one pound
    1/2 teaspoon ground black pepper

    INSTRUCTIONS
    1. Place the olive oil and red wine in a gallon size zip lock bag.  Poke the meat with a fork many times to allow the marinade to penetrate the meat.  Add the meat and seal the bag. Rotate the bag to coat the meat with the marinade.  Turn it occasionally and let it marinade for at least one hour.
    2. About 20 minutes before grilling, ignite grill, turn all burners to high, close cover, and heat until very hot, about 15 minutes. Scrape cooking grate clean with grill brush and oil the grate using a paper towel and Canola oil.
    3. Unwrap steak; insert 3 metal “skewers” lengthwise through center of steak, spacing skewers about 1 inch apart. Sprinkle the meat evenly with pepper. Place steak on hottest part of grill. Grill, flipping steak every 4 minutes, until instant-read thermometer inserted into center of meat registers 120 degrees for rare to medium-rare, 16 to 20 minutes. Flipping the meat once per minute keeps the long muscle fibers from contracting and buckling up, making it easier to achieve a good sear.
    1. 4. Transfer steak to cutting board and let rest, tented with foil, about 10 minutes. Remove skewers. Holding thin slicing knife at 45-degree angle to meat, slice very thinly and serve. 

    All American Potato Salad

    hello again loyal follower(s)

    Part two of today was Potato Salad.  The recipe used was published in Cooks Illustrated July 1, 2004.  Of course Mr Nut made some minor adjustments.  This Potato Salad was more healthy than the one Mr Nut really loves (lots of mayo), but it was good.  Mr Nut would have added radishes and just a little more mayo.   Also for color a sprinkling of paprika on top.  The sweet pickle relish was vetoed by Mr Nut and Cyndy.

    Here was the action:
    The potato skins were left on, since that is where most of the heathy ingredients are.

    It was important to not over cook the potatoes.


     Besides the potatoes, here were the rest of the ingredients,  The light green is chopped celery and the smaller cup is chopped red onion.


    The seasonings minus the eggs.


    Here was the proud Sous Chef with his rendition of the Cook's Illustrated recipe.


    Recipe follows:


    À bientôt,

    Mr Nut  alias  Sous Chef


    ALL-AMERICAN POTATO SALAD
    Based on Cook’s Illustrated website recipe Published July 1, 2004.
    Serves 4 to 6.     
    Note that this recipe calls for celery seed, not celery salt; if only celery salt is available, use the same amount but omit the addition of salt in the dressing. When testing the potatoes for doneness, simply taste a piece; do not overcook the potatoes or they will become mealy and will break apart. The potatoes must be just warm, or even fully cooled, when you add the dressing. If you find the potato salad a little dry for your liking,add up to 2 tablespoons more mayonnaise.
    INGREDIENTS
    2 pounds russet potatoes with skins, cut into 3/4-inch cubes
    1 tablespoon Sea salt
    2 tablespoons distilled white vinegar
    1 celery , chopped fine (about 1/2 cup)
    2 tablespoons minced red onion
    tablespoons chopped radishes
    1/2  cup mayonnaise 
    3/4  teaspoon powdered mustard
    3/4  teaspoon celery seed
    1 tablespoons dried parsley leaves
    1/4  teaspoon ground black pepper
    large hard-cooked eggs , peeled and cut into 1/4-inch cubes 
    Sprinkle paprika over top of salad

    INSTRUCTIONS
    1. Place potatoes in large saucepan and add water to cover by 1 inch. Bring to boil over medium-high heat; add 1 tablespoon salt, reduce heat to medium, and simmer, stirring once or twice, until potatoes are tender, about 8 minutes.
    2. Drain potatoes and transfer to large bowl. Add vinegar and, using rubber spatula, toss gently to combine. Let stand until potatoes are just warm, about 20 minutes. 
    3. Meanwhile, in small bowl, stir together celery, onion, radishes, mayonnaise, mustard powder, celery seed, parsley, pepper, and 1/2 teaspoon salt. Using rubber spatula, gently fold dressing and eggs, if using, into potatoes. Cover with plastic wrap and refrigerate until chilled, about 1 hour; serve. (Potato salad can be covered and refrigerated for up to 1 day.)

    Artisan Marbled Bread 33% Whole Wheat

    Hello loyal follower(s)

         As Sous Chef, today there were three thing being made simultaneously.  First there was the original rustic Marbled bread, the All American Potato Salad from Cook's Illustrated (published July 1, 2004).  Then London Broil for a Gas Grill also from Cook's Illustrated (published May 1 , 2006).  Since, of course, Mr Nut modified all recipes that he wishes to share, there will be separate blogs for each so that the recipes will be easier to locate.
    First the bread:
          In an attempt to develop a workable recipe for the  Whole Wheat Italian Rustic bread in the last blog, Mr Nut accidentally created a neat bread.  The recipe as presented on Cook's Illustrated (published September 1, 2003) took too much active time by the baker.  Also, Mr Nut prefers the Dutch Oven formed rounds.

    This was a perfect round, you could actually here the crust crackle as it cooled.   But get a load of the next picture.


    et Voilà ! Marbled bread; a mistake, but great tasting.  The dark area was 100% whole wheat, the very light color was 100% bread flour and the light tan area is a mixture of whole wheat and bread flour.

    Mr Nut's primary goal was a coarse bread with large air spaces, which mean't the mixing had to be kept to a minimum.
         Yesterday a Soaker dough and a Starter dough were mixed.  The Soaker dough was refrigerated (delayed fermentation) and the Starter was left on the counter to ferment.  This morning when the two dough were to be blended  they would not blend without using a dough hook. the doughs were then sort of manually mixed, yet at the same time Mr Nut tried to keep the mixing to a minimun.
    The result was a great bread.    Recipe at end of blog.

            The above bread making effort was just part of Mr Nut's  activity for the day.

    Mr Nut was very proud that he was able to do all three things at the same time and have it all ready right on time for dinner.

    À bientôt,
    Mr Nut


    Rustic Marbled 33% Whole Wheat Artisan Bread
    Blog from April 24, 2011, updated June 6, 20011
    Yield one 10” Round
    European style: (Crisp-crust; large air spaces)
    Inspired by Jim Lahey’s My Bread and 
    Cook's Illustrated website (Published September 1, 2003 )
    Modified for a Cuisinart stand mixer, with speeds from 1 to 12
            This recipe provides the ultimate freedom of choice with timing and techniques.  It is possible to start this bread anytime of the day and modify the fermentation time to meet your schedule.  
        Bread flour is wheat flour minus the germ the bran leaving only the endosperm. The endosperm contains the two proteins needed for making gluten. Vital Wheat Gluten needed to be added to help compensate for the lack of gluten-forming proteins in the whole wheat flour.
    A Soaker dough made up from the whole wheat flour used delayed fermentation (3 to 10 hours) to allow the softening of the bran in the whole wheat flour 
            The following (optional) natural healthful ingredients are added to improve bread volume or taste. 
    Salt: Sea Salt, which contains additional minerals for better gluten development.
    Dough Enhancer: self explanatory (see blog from April 5, 2011). 
    Wheat Gluten: It helps improve the rise and texture of the bread.
    Fresh Rosemary: A natural antioxidant, acts as a preservative and flavorer.
     Long fermentation at room temperature eliminates kneading and allows for the yeast to work its magic.
    Soaker Dough:
    2 cups whole wheat flour ( 10 ounces, 280g)
    1/4 cup vital wheat gluten (1.25 ounces, 35g)
    1/2 teaspoon instant dry yeast
    1 cup 40-50℉ water (8 fl ounces)
    Starter Dough:
    4 cups (20 oz, 560 g) flour bread flour
    1 tablespoon Sea Salt
    1/4 cup Dough Enhancer
    1/2 teaspoons instant dry yeast
    2 teaspoons chopped fresh rosemary
    1 2/3 cups warm water at 110-115℉
    1. Soaker Dough:  In the mixer bowl using the Chef’s Whisk at speed one, mix the blue ingredients.  Change to the Flat Paddle Blade on speed 1 and add the one cup cold water.  Keep mixing to a minimum.  Delayed fermentation: Move the dough to another bowl.   Spray the top of the dough with oil, and cover the bowl with plastic wrap.  Refrigerate  the dough for 3 to 10 hours. Make the time fit your time schedule. 
    2. Starter Dough: In the mixer bowl using the Chef’s Whisk at speed one, mix the red ingredients.  Change to the Flat Paddle Blade on speed 1 and add the one and two-thirds cup 110-115℉ water.  Keep mixing to a minimum. Move the dough to another bowl with a cover (so the mixer bowl can be cleaned), and let it ferment until the Soaker Dough is ready to be added.
    3. Combine the Soaker Dough and Starter Dough:  The Soaker dough is very stiff and will have to be broken up into small pieces (about 1/8 cup size) and blended into the Starter dough by hand. Sort of a kneading effort, keep it to a minimun.  The dough will be marbled.
    4. First fermentation  at room temperature (72℉) for 12 to 18 hours. If convenient, vigorously stir the dough about halfway through the rise. Again, make the time fit your time schedule, even 12 hours is workable.
    5. Deflate dough:  Gently press down on center of dough to deflate. Holding edge of dough with fingertips, fold dough over itself by gently lifting and folding edge of dough toward middle. Add more rye flour if the dough is sticky, aim for a stiff dough. Turn bowl quarter turn; fold again. Turn bowl and fold dough 6 more times (maximum of 8 folds). 
    6. Second Fermentation: Set out a 15-inch square of baking parchment paper. Spray it with nonstick spray, then generously dust it with rye flour. Invert the dough into the center of the parchment. Generously dust the dough with more rye flour. Smooth out and round the surface to form a round shaped, domed loaf; it may be sticky, so flour your hands, and sprinkle more flour over the top as needed. Using the parchment paper as a sling, transfer the loaf to a skillet or  bowl just slightly smaller in diameter than the dutch oven to be used. Tent the bowl with nonstick spray-coated foil.  Let it ferment for 1 1/2 to 2 hours until the dough doubles from the deflated size.
    7. Prepare Oven: 20 minutes before baking time, put a rack in the middle of the oven with the dutch oven; preheat to 450°F. If you have a pizza stone place it near the bottom of the oven it will act as a heat sink. 
    8. Final Dough preparation: Sprinkle or spray the dough top generously with water.  Using well-oiled serrated knife or razor, cut a 1/2-inch-deep, 3-inch diameter circular slash in the dough center. Using the parchment paper as a sling, carefully lift the dough into the pot; take care not to touch the hot pot. Immediately top the pot with its lid.
    9.  Baking: Reduce the heat to 425°F. Bake on the lower rack for 45 minutes. Remove the lid. Using the parchment paper, lift the loaf from the pot and place on a piece of aluminum foil. Pull the parchment away from the loaf sides so they are exposed. (If the top is well browned, cover it with foil.) Bake for 25 to 35 minutes longer, until a skewer inserted in the thickest part comes out with just a few crumbs on the tip (or until the center registers 210° to 212°F on an instant-read thermometer). Then bake for 5 minutes longer to ensure the center is baked through. Note: the appearance of the loaf is more important in determining the doneness of the loaf than the internal temperature (from Cook's illustrated magazine, May-June 2011 page 31).  Cool  thoroughly on a wire rack.

      Thursday, April 28, 2011

      Whole Wheat Rustic Italian Bread -too much work

      Hello loyal follower(s)

            It was time to thin out the beets, therefore, beet greens are on the menu for us and or neighbors for tonight.


      This was our share of the greens for tonight.


            Yesterday Mr Nut started making Whole Wheat Rustic Italian bread from the Cook's Illustrated website. (Published September 1, 2003) Aside from the fact that the recipe called for two teaspoons of salt and two tablespoons were put in the bread came out OK.  However, there were five fermentation periods:  First was overnight, that was no problem.  The second one was only for twenty minutes followed by three at hour long fermentations then there was the time for baking.  TOO TIME INTENSIVE!
            The bread was only 31% whole wheat, Mr Nut would prefer at least 50% whole wheat.  There was also kneading which could have been avoided.  Anyway here is a blow by blow of this experiment.


      This was the dough after being combined with the Starter Soaker dough and THREE fermentation periods.

      This recipe was to make just one 16" long loaf.


      The loaf was now fermenting for the fifth period.
      Notice it was on parchment paper and is covered with plastic wrap.


      In the heat, without a Dutch Oven nor bread pan.


      The bread was done at 205℉.  Mr Nut prefers loaves that are less flat.


      The crumb was good but would have been better with less kneading.  It was very salty, but thank  goodness for neighbors who will help eat this stuff.


      Mr Nut will now write a better recipe for next time.

      À bientôt,
      Mr Nut

      Tuesday, April 26, 2011

      Theory: Bread Making Processes

      Hello loyal follower(s)

      The theory behind  breadmaking processes need to be included in this blog  so that Mr Nut, (or maybe you) can use them as references.
             First some pictures from are  garden:

      Water is precious here in the desert, so Mr Nut made metal deflectors for the sprinkler heads to better direct the flow of water.   The vegetation around the sprinkler are beets.  They are growing very well.


      The pea pods are blossoming ( They are hard to see, but look carefully at center near top of picture).


      There are millions, OK! almost a hundred strawberries starting to ripen. Note the bird netting.


      Now for a little theory;

      Mixing, kneading, fermentation and Deflation are major contributors to the texture of the bread. Understanding what each of these procedures does will help you get the texture you want—whether very fine-crumbed loaves with the fast rising times of the direct method or rustic coarse-textured rounds made with starters. Time and the temperature have an influence.
      Mixing
      Mixing not only blends ingredients but also traps air bubbles into the dough, which yeast gases will enlarge, so the texture of the bread begins right here.
      Delayed Fermentation:  Chilling and retarding 
      Chilling the dough for a significant time, say overnight or longer, will influence the bread in three ways:
      Enhances flavor: The cold forces the yeast into dormancy so it is no longer gobbling up all the available sugars. The bacteria then can feed and produce some of their flavorful acids, which add subtle complex flavors and enhance keeping quality. Acids produced at cold temperatures (30° to 40℉) are wonderfully flavorful, and even at cool temperatures are good. However, terrible-tasting short-chained acids are produced if the dough is hot for a long period.
      Reduces ovenspring and loaf volume : Chilling for a period as long as overnight reduces ovenspring (oven fermentation) and reduces loaf volume. Alcohol that was  made by the yeast from the beginning changes to a gas in the hot oven and is a contributor to ovenspring. During a lengthy cold period, alcohol simply evaporates from the surface of the dough and some goes to vinegar. Thus, there is a reduced amount of alcohol to contribute to ovenspring. Chilling reduces the carbon dioxide in the bubbles, which contributes to a slight change in texture and possibly slightly reduced ovenspring and loaf volume.
      Opens texture slightly : Chilling dough retards the action of yeast and influences texture.  The air-bubble nuclei worked into the dough during mixing and kneading are enlarged by gases from the yeast. Initially these tiny bubbles contain air, which is mostly nitrogen. Immediately the yeast uses up the oxygen so that you have mostly nitrogen in these tiny bubbles. The gases from yeast are essentially carbon dioxide, and they enlarge the same bubbles. The longer the dough rises, the more carbon dioxide there is in the enlarged bubbles.  After a long rise, the bubbles contain a very high percentage of carbon dioxide and a very low percentage of nitrogen. The longer the fermentation, or after multiple deflations, the higher the percentage of carbon dioxide. After a very long fermentation or two or three shorter fermentations, the bubbles contain essentially 100 percent carbon dioxide.
      Carbon dioxide dissolves very well in cold water. So, if the dough is chilled, the carbon dioxide in a great number of bubbles will completely dissolve. The dough now has fewer bubbles for the gases from yeast to enlarge. When the dough is warm again, the yeast puts much more gas into these fewer bubbles, creating bigger bubbles and a coarser bread.  It is possible to have the positive effects of overnight chilling—enhanced flavor and slight opening of texture without reduced volume. 
      With the Lahey method; letting the dough and yeast ferment for 12 to 18 hours makes kneading unnecessary.  The dough's fermentation, which is a form of molecule-by-molecule stretching, is the key step in dough development. Picture the gases from yeast inflating millions of tiny air bubbles throughout the dough, puffing and stretching the gluten proteins so that they can cross-link to their neighbors and form better and better sheets of gluten.
       Kneading; (optional but can be useful, it will affect the bread texture) 
      Kneading helps the dough proteins connect and cross-connect to form stretchy  sheets of gluten. The goal is to align protein strands in the same direction for the creation of strong gluten sheets and to incorporate air. You can knead a dough too much.  The dough turns into a gooey, inelastic mess.  Also when the dough is kneaded at an appropriate speed and then at a much lower speed. The gluten proteins seem suddenly to become disoriented, and a sticky, inelastic dough that looks exactly like an overkneaded dough appears instantly.  Fortunately, you can redevelop the gluten in this unmixed dough by turning the speed back up. You may get away with this once or twice; however, there's a limit to how many times a dough will tolerate being mixed and unmixed.  Temperature is also important. The gluten proteins absorb water better and consequently make more gluten if the dough temperature at the end of kneading is about 75°F.  If the kneading is started with the dough temperature in the low 70s°F, the kneaded dough should end up at about  the ideal temperature. by replacing  one fourth  to one third cup of the recipe’s liquid with crushed ice just before kneading lowers the starting dough about five degrees F. 
        
      Deflating: Punching down”; means turning the dough inside out. Heat builds up in the center of the dough from fermentation. This turning action pulls the cooler outside dough to the center and the warmer dough to the outside. The yeast was dividing and multiplying. Punching helps redistribute the clusters of yeast cells formed during the first fermentation to a new food supply throughout the dough and adds more air to the dough.  This will allow for better yeast action.  
        If the dough tends to be sticky, consider oiling your hands to prevent sticking to the dough.  A pastry scraper is a great help with sticky doughs. If you just can't stand the wet dough, add a little more flour, but keep the dough very soft. The dough should be dry enough to form a slightly sticky but workable ball.
      Rounding
      In good gluten development, protein strands are aligned and stretched in the same direction.  Rounding the dough pieces aids in aligning gluten and in holding the gas. After punching down, the dough is in an odd shape, and if it has been cut, gases in the dough can easily escape. By tucking the dough into a tight smooth ball you create a covering to hold gases better.  Cover the ball and let it “rest” on the counter for 15 minutes. The relaxed dough is now much easier to shape. Rounding  is well worth the few extra minutes.
      Shaping
      After the rounded dough has rested, it is easy to shape. Each recipe has shaping suggestions and directions.  Generally there is little need to be real careful with this process. Slashing
      Slashing permits dough expansion and allows steam that could be trapped under the crust to escape. Loaves done in a Dutch Oven generally do not need to be slashed.  If you choose to slash, do it just before placing the dough into the oven. 

      À bientôt,

      Mr Nut