As mentioned yesterday the 82% Whole Wheat Artisan Bread needed some tweaking to slow down the drying out of the bread. Granted, here in St George the humidity is usually around 10%, things dry fast. Also Mr Nut wanted less whole wheat taste.

Here were the results of eight hours of fermentation for the Starter Dough and eight hours of delayed fermentation by refrigeration. Starter on the left and Soaker on the right.

The final bread dough after ninety minutes of the second fermentation.

After 25 minutes of baking in the closed Dutch Oven the temperature was 145℉.
Most of the baking of the bread occurred while the cover was on the Dutch Oven, therefore the cover should have been left on for about 30 minutes so the internal temperature was closer to 170℉.
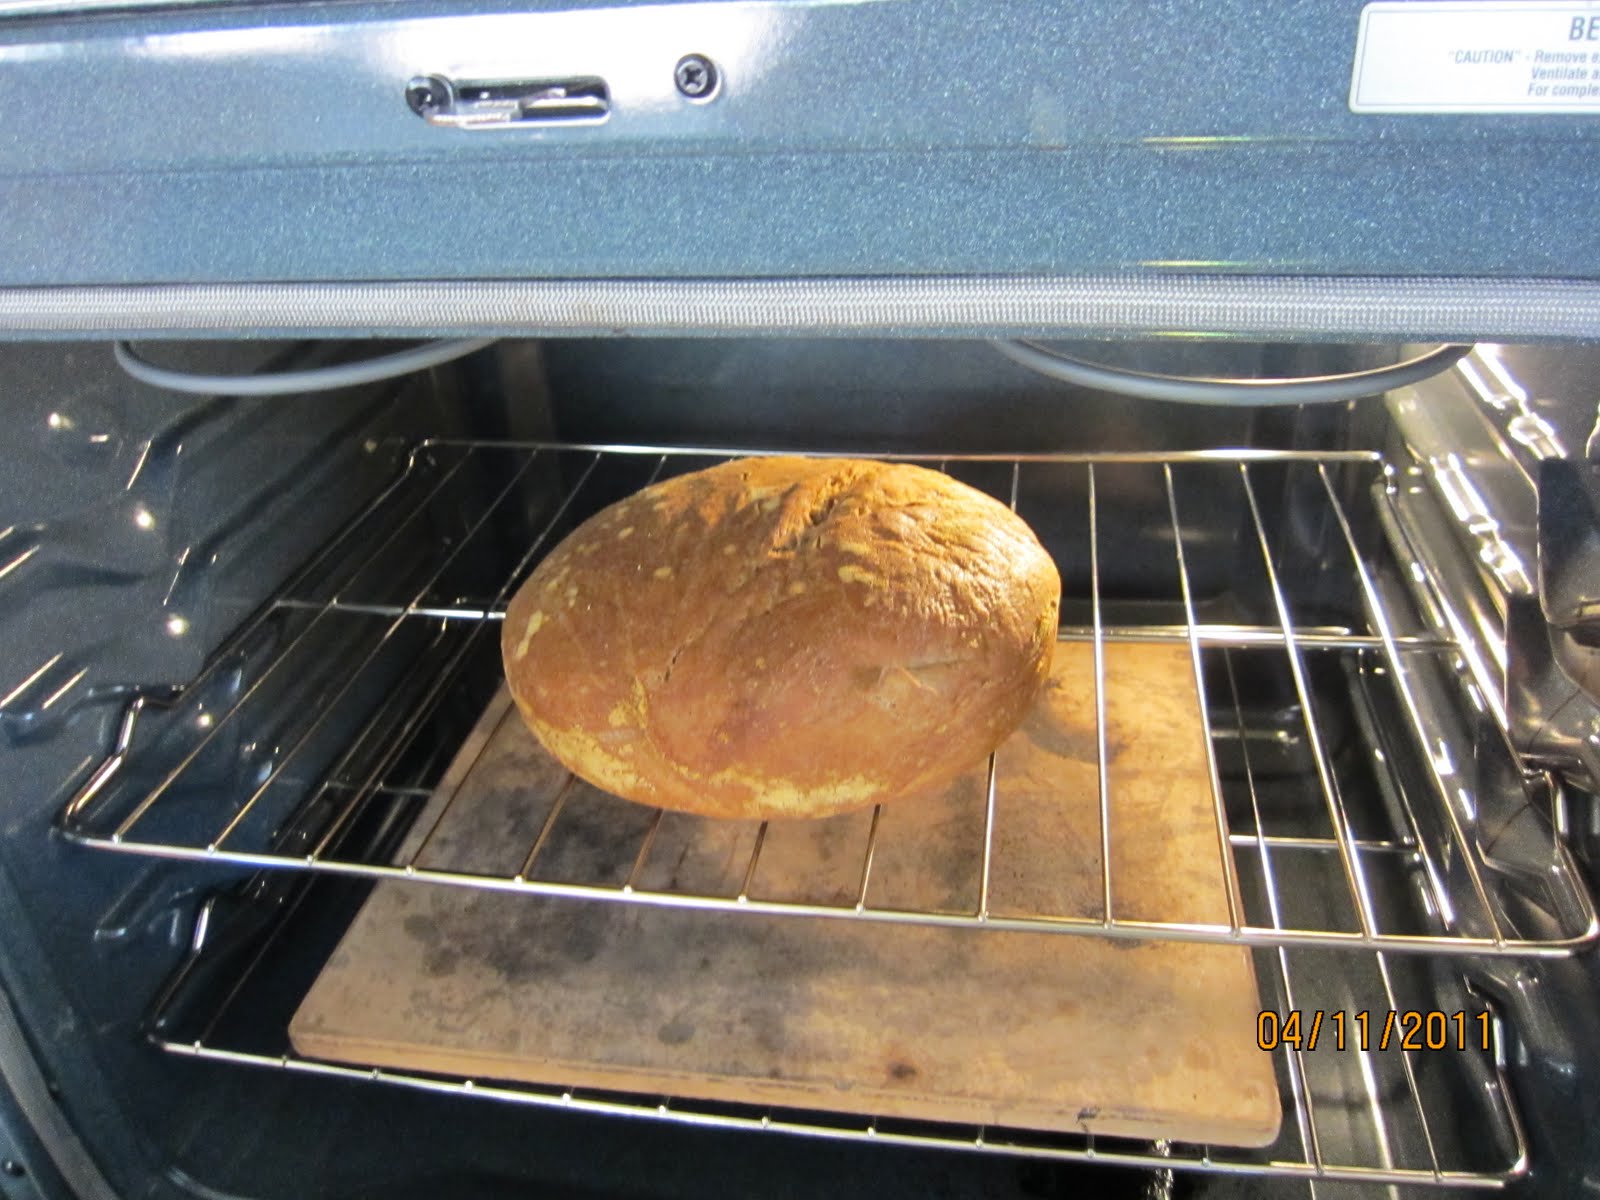
After ten minutes of baking without the cover on the Dutch Oven the loaf was firm enough to remove from the Dutch Oven and place directly on the oven rack.

The final result was a hard crusted chestnut brown loaf. However, it took 35 minutes to get the internal temperature up to 197℉.
By leaving the cover on the Dutch Oven 30 minutes instead of 25 minutes the time to crisp up the crust and obtain the desired internal temperature should be reduced.

A great looking crumb. The loaf was nine and a half inches in diameter and about four inches high.

May I present to you a great recipe.
À bientôt,
Mr Nut
Recipe follows
82% Whole Grain Artisan Bread
Inspired by Cook’s Illustrated recipe in March 2011 issue
Modified for 7 qt Cuisinart stand mixer.with speeds from 1 to 12
Makes one 10” Round
This recipe provides the ultimate freedom of choice with timing and techniques. It has been written for a Cuisinart stand mixer, but hand mixing is also used. It is possible to start this bread anytime of the day and modify the refrigerator time or the fermentation time to meet your schedule. The Dutch Oven used had a base a with large diameter (10”). Alternately, the bread pan (9” x 5”) method of baking in the oven with a pan of water should yield good results, but with smaller more uniform air pockets. The dough should be slightly sticky but workable.
This recipe provides the ultimate freedom of choice with timing and techniques. It has been written for a Cuisinart stand mixer, but hand mixing is also used. It is possible to start this bread anytime of the day and modify the refrigerator time or the fermentation time to meet your schedule. The Dutch Oven used had a base a with large diameter (10”). Alternately, the bread pan (9” x 5”) method of baking in the oven with a pan of water should yield good results, but with smaller more uniform air pockets. The dough should be slightly sticky but workable.
Whole Wheat floor contains; the germ the bran and the endosperm. The endosperm contains the two proteins needed for making gluten. The key to making this bread is the softening of the bran of the kernels of whole wheat flour by mixing the flour with water and delaying fermentation overnight or up to twenty-four hours by refrigeration. This lessens the deflation of the dough by the punctures caused by sharp edges of the bran.
The following (optional) natural healthful ingredients are added to improve bread volume or taste.
Salt: Sea Salt, which contains additional minerals for better gluten development.
Dough Enhancer: (see blog of April 5, 2011)
Delayed fermentation is a relatively new technique. By using ice cold water (40 -50℉) in the mixing of the dough and delaying fermentation by refrigeration, the Bran of the Whole Wheat floor was softened reducing the tearing action of the sharp edges of the Bran. Yeast remains inactive while enzymes in the in the flour go to work improving flavor, strengthening gluten etc..
Long fermentation at room temperature eliminates kneading and allows for the yeast to work its magic. In this recipe the kneading was used with the Soaker Dough.
INGREDIENTS
Starter dough:
1 cup (5 ounces 140 g) bread flour
1 cup (5 ounces 140 g) whole grain Oat flour
1/2 teaspoon Instant dry yeast
1 tablespoon Sea salt
6 tablespoons dough enhancer
1 1/4 cup (4 ounces) warm water ( 110-115℉)
1/4 cup Honey
Whole Wheat Soaker dough:
4 cups (20 ounces 560g) whole wheat flour
1/2 cup wheat germ
1/2 teaspoon instant dry yeast
2 cups cold (40℉ to 50℉) water
- Starter: Using a wooden spoon, Combine the Blue ingredients in a bowl until uniform slightly damp dough forms. Cover bowl and let stand at room temperature (70-75℉) overnight or up to 24 hours.
- Whole Wheat Soaker: In the heavy duty stand mixer bowl using the Flat Paddle at speed 1, combine the Green ingredients just until uniform damp dough forms. Place the dough an oiled bowl and cover the bowl with plastic wrap. Delay the fermentation by refrigeration overnight or up to 24 hours.
- Combine 1 and 2 for the Dough: Place the Starter Dough in the stand mixer bowl. Break up the Whole Wheat Soaker Dough into small pieces about 1/8 cup size and add the pieces as the mixer is running at speed 2 with the Flat Paddle. Mix only until dough is smooth and elastic. Shape dough into ball and place in an oiled container. Cover and allow to rise at room temperature about 9 to 18 hours.
- Deflate dough: Gently press down on center of dough to deflate. Holding edge of dough with fingertips, fold dough over itself by gently lifting and folding edge of dough toward middle. Add more flour if the dough is sticky, aim for a stiff dough. Turn bowl quarter turn; fold again. Turn bowl and fold dough 6 more times (maximum of 8 folds).
- Second Fermentation: Set out a 15-inch square of baking parchment paper. Spray it with nonstick spray, then generously dust it with flour. Invert the dough into the center of the parchment. Generously dust the dough with more flour. Smooth out and round the surface to form a round shaped, domed loaf; it may be sticky, so flour your hands, and sprinkle more flour over the top as needed. Using the parchment paper as a sling, transfer the loaf to a skillet or bowl just slightly smaller in diameter than the dutch oven to be used. Tent the bowl with nonstick spray-coated foil. Let it ferment for 1 1/2 to 2 hours until the dough doubles from the deflated size.
- Prepare Oven: 30 minutes before baking time, put a rack in the middle of the oven with the dutch oven; preheat to 450°F. If you have a pizza stone place it near the bottom of the oven it will act as a heat sink.
- Final Dough preparation: Using well-oiled serrated knife or razor, cut a 1/2-inch-deep, 3-inch diameter circular slash in the dough center. Using the parchment paper as a sling, carefully lift the dough into the pot; take care not to touch the hot pot. Immediately top the pot with its lid.
- NOTE: If you are using cast Iron pots you may want to adjust the temperature up to 450℉, and maybe increase the baking time. This recipe is based on using a hard-anodized aluminum Dutch Oven. Bread pans are dark non-stick pans.
- Baking: Reduce the heat to 425°F. Bake on the lower rack for about 30 minutes. Remove the lid. Using the parchment paper, lift the loaf from the pot and place on a piece of aluminum foil. Pull the parchment away from the loaf sides so they are exposed. (If the top is well browned, cover it with foil.) Bake for 25 to 35 minutes longer, until a skewer inserted in the thickest part comes out with just a few crumbs on the tip (or until the center registers 195 to 200°F on an instant-read thermometer). Then bake for 5 minutes longer to ensure the center is baked through. Note: the appearance of the loaf is more important in determining the doneness of the loaf than the internal temperature (from Cook's illustrated magazine, May-June 2011 page 31). Cool thoroughly on a wire rack.
No comments:
Post a Comment