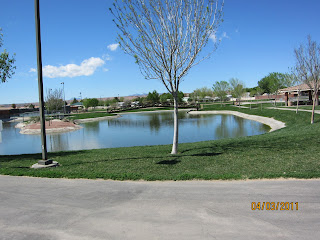
Yesterday was a day for Cyndy to "spend" her time playing the slots at the casinos in Mesquite Nevada which is only 35 miles from our home. It was windy, but warm and Mr Nut biked around the town on the biking- hiking paths. Even though it is a desert town, there are some nice local parks. Mr Nuts picture taking skill pale compared to his daughter-in-law (Lori), but he tries.
This was an example of a local park along the bike trail.
There were turtles sunning themselves on the island shown in this picture.
Using the "zoom" button on my camera yielded this close up of a couple of the turtles on the island.
This was and is and will be my office in Mesquite the days Cyndy gambles on the slots. It is located in a room off the lobby of the hotel next to one of the casino. There is no smoke and it is quiet and there is internet connection.
Tomorrow Mr Nut hopes to finalize the recipe for Cheese Pizza Dough, but until then here is some boring but necessary theory on bread making:
Equipment: My motto is “If your are going to do anything right, you need the right tools”.
Heavy duty stand mixer (Cusinart seven quart) seems just right for bread making.
Kitchen scale in grams and ounces.
Thermometer (with probe) that reads up to at least 300℉.
Timer.
Measuring cups.
Dough cutter.
Measuring spoons
Wooden spoon.
Rubber Spatula
Two “Dutch Oven” type pots with a base diameter between 6 and 8 inches.
Two 4.5” X 8.5” bread pans (with dark non-stick finish).
Two 5” X 9” bread pans (with dark non-stick finish).
Baking Stone.
Baking on hot a pizza stone gives you excellent light loaves of bread. Place the stone on an oven shelf as close above the exposed element as your oven rack holders permit. Every time you open the oven door some of the heated air escapes and the stone acts as a “heat sink”. The pizza stone helps overcome this loss of heat.
You can tell from your baked loaf of bread whether the stone is at the correct heat. If the bottom is burned or if the bottom inch of the bread is much denser and tighter in texture than the rest of the loaf, the bottom is cooking before the dough can rise. Your stone is too hot.
Basic Information About Equipment
1. The color and composition of the bread pan or Dutch Oven will affect the baking time. Generally, the darker the color, the shorter the baking time with a lower baking temperature.
2. The location of the Dutch Oven in the oven will affect the crispness of the crust and whether the crust will be over browned, ( the politically correct way of saying burnt).
3. Aerosol cooking sprays - not good. These sprays contain a chemical propellant that is difficult to remove from cookware.
4. The diameter of the base of the Dutch Oven is important for making Rounds. The ideal diameter is 7 to 8 inches. Anything larger creates a Round that is too flat.
5. The cover of the Dutch Oven type pan must fit tight enough to prevent steam from escaping.
My bread recipes were based on the Use of a Calphalon (brand) Contemporary hard-anodized aluminum non-stick 5 qt. Dutch Oven with a base diameter of 10”. It was oven safe to 450℉. It cooks faster at a lower temperature than regular aluminum, cast iron, or pottery pots. However because of the large base diameter, round loaves were too flat. Thus two Emerilware cast iron 6 quart Dutch Ovens with a base diameter of 7.75 inches have been added to my equipment.
À bientôt,
Mr Nut


These posts are wonderful! And your photos are just as good as mine. Plus you have better editorial content. I need to work on that.
ReplyDelete